All About - Moon Phase Clocks
ALL ABOUT MOON PHASE CLOCKS (Including How To Set Them)
You may have bought a Moon Phase clock, or be looking to buy one, but either way, this guide will inform you all about the moon phases, why we have them, what they are, and how to set your Moon Phase clock if you have one.
THE BASICS…Why do we have Moon Phases?
The Moon, with the help of Earths gravitational forces stopping it from flying away, spends all of its life continuously orbiting around the earth. As the orbital path is on the same plain as the earth and sun, the moon passes both in front of the Earth, i.e. in-between the earth and sun, and also behind the earth, so it becomes invisible to the sun.
Just like here on the Earth, the sun shines on the Moon as well, but because the surface of the moon consists of a light grey dust and rock surface, it reflects the light away much brighter than the Earth does. This means that from here on earth, the moon looks brightly lit up when the sun is shining on it. However, the sun only lights up half the moon as it only shines on the side facing the sun (just like the way it only shines on half of the Earth too).
So only half of the moon is lit up at any one time, and it is not always the side that is facing us, as it spinning round our planet at the same time that we are spinning too. We take one day for a full rotation, which gives us our day and night, however the moon takes 29.5 days to rotate round Earth which is the complete time to go from one Full Moon, to New Moon, and back to Full Moon again. So we are left with a scenario where sometimes we can see the whole circle shape of the moon lit up (Full Moon), and sometimes we cannot see any of it because the face that is towards us is in darkness and the side lit up is round the other side (New Moon). Obviously it is still there, but in complete darkness and very difficult to see.
So What Are The Moon Phases?
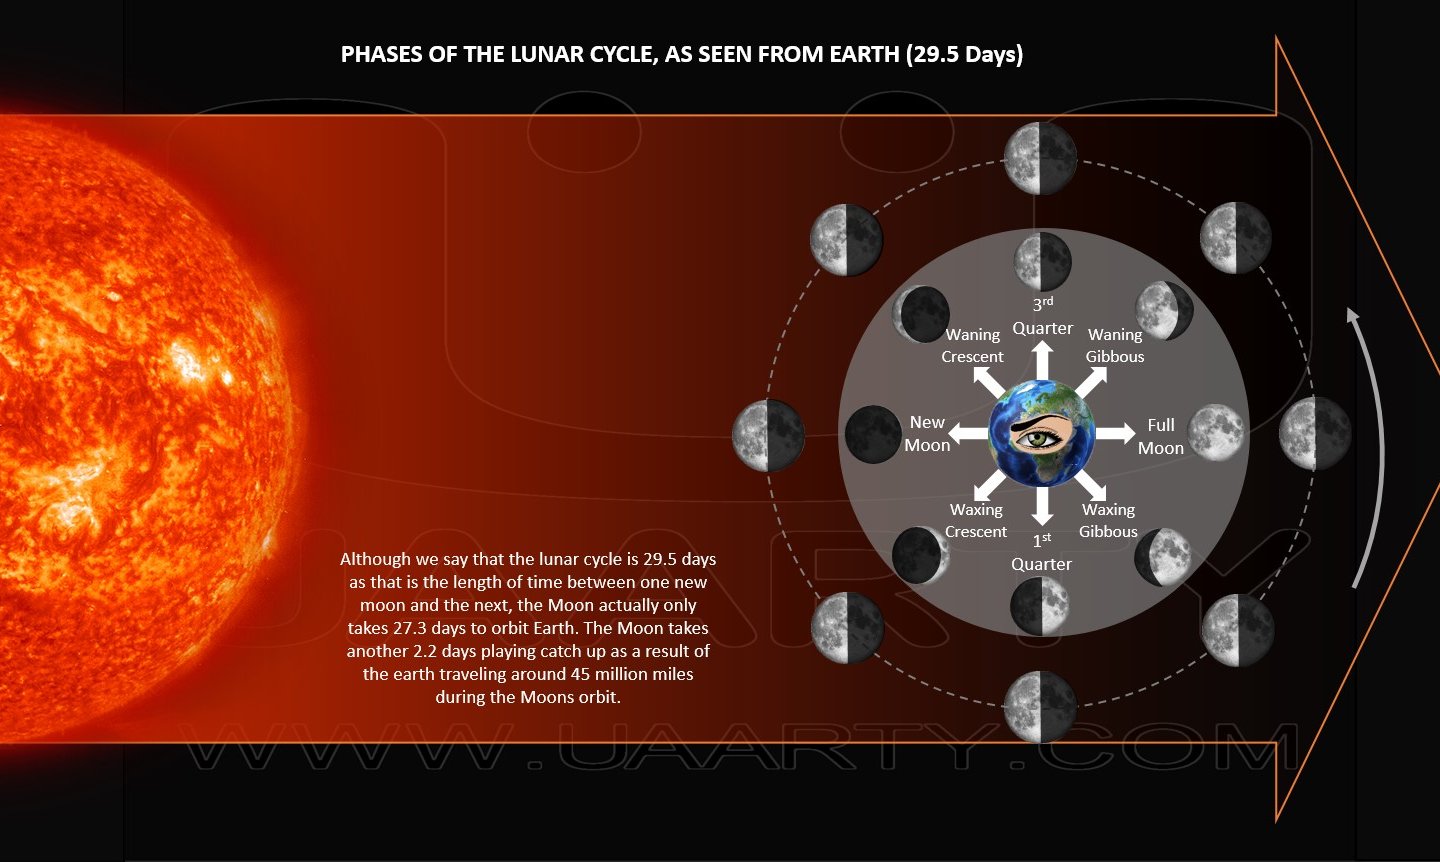
If we start from when the moon is in-between us and the sun, so that the side that is lit up is facing the sun and invisible to us, this is what is called a new moon. From there as the moon rotates and we get to see more and more of the side that is lit up, it goes from nothing, to a crescent (a quarter of the circle), to a quarter (called 1st Quarter), to what is called 'Gibbous' (which is like 3/4 of the circle), and then on to a full moon. This is when the moon is round the back of the Earth, so both us and the sun are looking from the same direction and can see the same side, hence the complete circle is lit up. In this first half of the cycle, the term 'Waxing' is used for the Crescent and Gibbous phases.
The pattern and phases then go in reverse until the moon is completely invisible again (full moon to Gibbous, to 3rd Quarter, to Crescent). The term 'Waning' is used for the Crescent and Gibbous phases when the moon is in the disappearing half of the cycle. Check out the following diagram to explain it visually


So On To The Important Bit...How Do We Set Up A Moon Phase Clock Correctly?
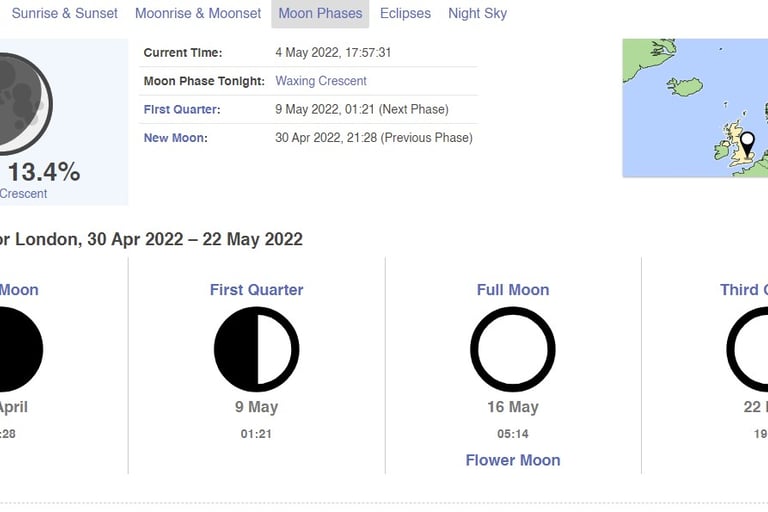
First item on the list is to find a good website that tells us what the current moon phase should be. We suggest using 'Timeanddate.com' which can be visited by clicking here. For this example, we will take a screen shot of the info shown so we can reference the information given. This is what you should see (this example is for 4th may 2022):


The most reliable way to set a Moon Phase clock is to wait until either Full Moon or New Moon, which you can see the date and time of the next occurrences in the screen shot above. If you try to gauge the progress of the moon whilst waxing or waning, you will find that the daily percentage progress is not linear so will lead to errors in the setting of the clock. If there is still some time until either full or new moon, then you can always attempt to set the clock according to the website data, but ensure that you re-visit the activity when a new or full moon occurs to re-set the clock correctly.
So essentially, once the moment of a new or full moon occurs, ensure the clock hand is pointing at the correct one, and insert the battery.
Job done.
Address
UAARTY™
UNIT A
12 Bishop Drive
Birmingham
B37 7PZ
United Kingdom
Subscribe to our Quarterly newsletter
Contacts
+44 (0)333 33 99 809
enquiries@uaarty.com
Our Blog
Shipping Policy
Returns policy
Terms & Conditions
Payments Taken:
